

| Back to Table of Contents Calendar Views OntarioCities contains some useful Business Tools (fig 1.0 (  )) to help you manage your online business.
One of these is the Calendar. The Calendar allows you to enter information by date and time so you may track your schedule anywhere
you have access to a web browser. Clicking the Calendar link brings you to fig 5.0. You may add appointements by clicking the Add button in section )) to help you manage your online business.
One of these is the Calendar. The Calendar allows you to enter information by date and time so you may track your schedule anywhere
you have access to a web browser. Clicking the Calendar link brings you to fig 5.0. You may add appointements by clicking the Add button in section  .
Section .
Section  is the month navigation. In section is the month navigation. In section  is the calendar for the selected month. The current day
is shaded in grey and shortend Title for appointments corresponding day. Clicking a title will allow you to view/edit the appointment. is the calendar for the selected month. The current day
is shaded in grey and shortend Title for appointments corresponding day. Clicking a title will allow you to view/edit the appointment.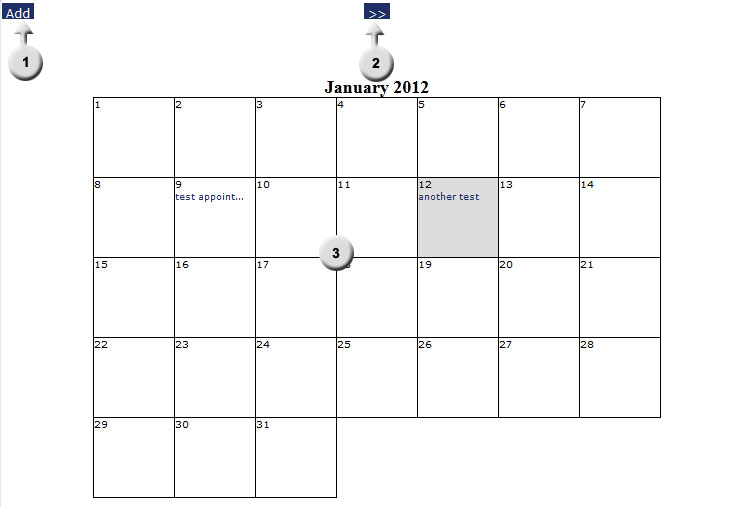 fig 5.0 Add Appointment 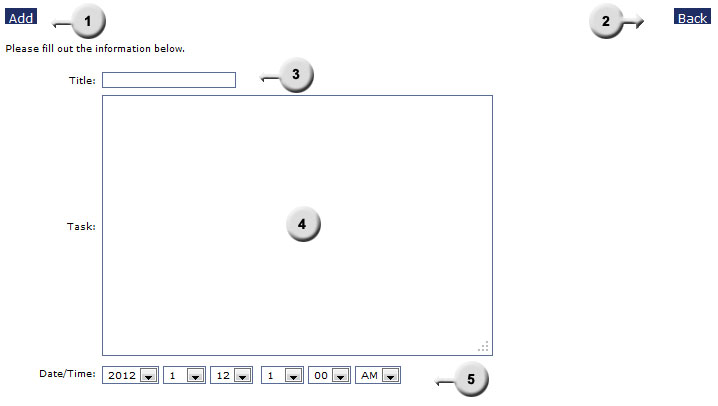 fig 5.1 You may add the information you enter by clicking Add in section or go back to the calendar by
clicking Back in section . Section is where
you enter your title for the appointment. This is required and a shortend form is shown on the main calendar. Section  is where you may
enter the Task. This is the detailed information for the appointment and is not required.
Section is where you may
enter the Task. This is the detailed information for the appointment and is not required.
Section  is where you enter the date/time of your new appointment. You must enter this information in the order Year/Month/Day. The days automatically
change depending on the months selected. is where you enter the date/time of your new appointment. You must enter this information in the order Year/Month/Day. The days automatically
change depending on the months selected.View/Edit/Delete Appointments 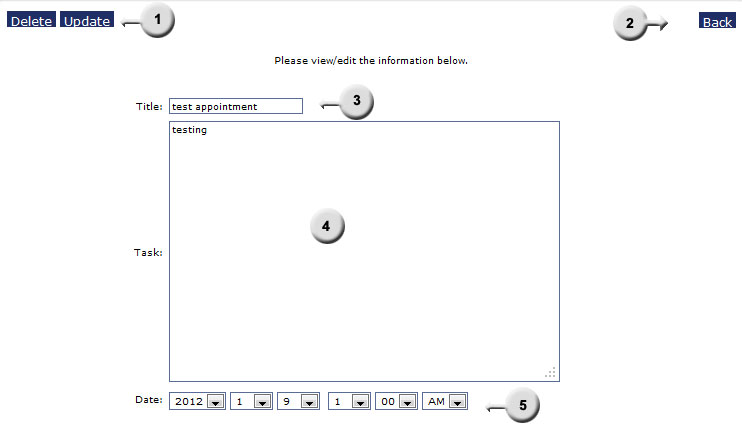 fig 5.2 When you click on an Appointment Title you are taken to fig 5.2. This page allows you to edit, delete or view appointment details.
Contacts Main Area 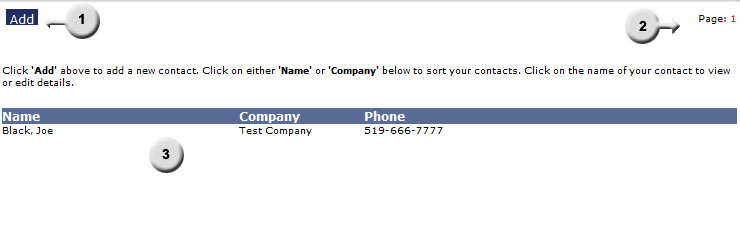 fig 5.5 OntarioCities also supplies a place for you to store contact information about clients, suppliers, friends, etc. By clicking on the Contacts link (fig 1.0 ( )) you are to the main area as shown in fig 5.5. Contacts are listed in groups of 10 (fig 5.5() and can be sorted by Contact
Last Name (click on the Name column heading) or Company Name (click on the Company column heading). Contact can be paged through by using
the controls . Contacts may be added by clicking the 'Add' button .Add Contact 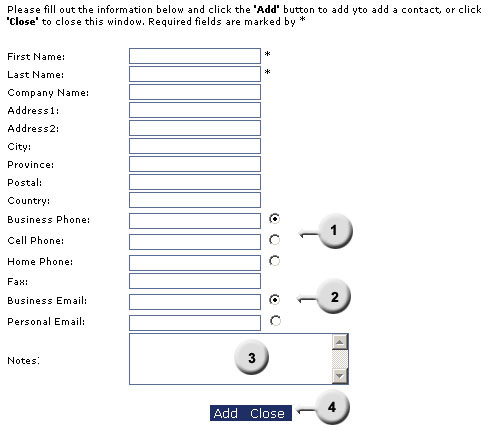 fig 5.6 By clicking the Add button in fig 5.5( ) a new window will open as shown in fig 5.6. The only required information for a contact is
First and Last Name, all other areas are optional. The radio buttons in sections and are used to signify the preferred phone/email for the contact. Section
is where you can add any additional notes about the contact. Once you have entered all the the desired contact information click the 'Add' button in
section to add them to your Contacts.Edit/Delete Contact fig 5.6 By clicking on a contact name (fig 5.5( )) you can Edit or Delete your contacts. Section
will allow you to update the contact or delete and section will take you back to the Contacts page. Section is where you
may edit the contact information. As with the Add contact the only required fields are
the First and Last names.Note Pad 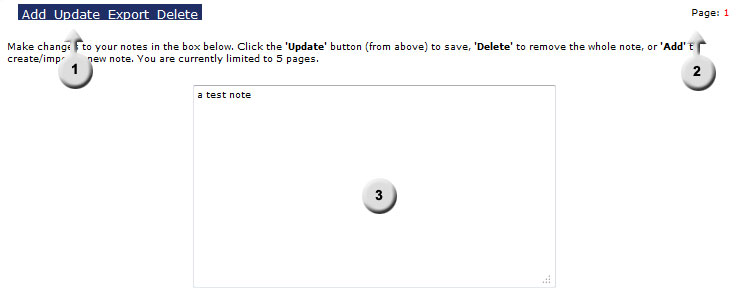 fig 5.8
Back to Table of Contents |