| Back to Table of Contents Your Website Overview  fig 6.0 OntarioCities allows you to add content, add/delete pages and much more from the controls. Clicking the Edit Website link  )) ))
Adding Pages  fig 6.1 Fig 6.1 shows the Add Page page. In order to add a page enter the name of the page (  ) as you want it to appear in the menu. Please
note you cannot use ?"/\<>*|:~^,%&' in a name as system problems could occur. Next select whether this page will go in the main navigation or be a sub-page in section ) as you want it to appear in the menu. Please
note you cannot use ?"/\<>*|:~^,%&' in a name as system problems could occur. Next select whether this page will go in the main navigation or be a sub-page in section
 . A sub-page is a popout that when you mouse over, a main menu item becomes visible. Section . A sub-page is a popout that when you mouse over, a main menu item becomes visible. Section  is where you select an existing page. If you are adding to your main menu the new menu
item will follow this page. If you are creating a sub-page the new page will be associated with this page. It will appear when you mouse over this menu item. Click the 'Create' button
in section is where you select an existing page. If you are adding to your main menu the new menu
item will follow this page. If you are creating a sub-page the new page will be associated with this page. It will appear when you mouse over this menu item. Click the 'Create' button
in section  to create the new page. If you have not done so already you may also add specialty pages such as a Links page or Guestbook. You cannot add sub-pages to
specialty pages. to create the new page. If you have not done so already you may also add specialty pages such as a Links page or Guestbook. You cannot add sub-pages to
specialty pages.Deleting Pages  fig 6.2 Fig 6.2 shows the Delete Page page. You may delete a main menu item and all the associated sub-pages by selecting the menu item in section . If you wish to
delete a sub-page select the main page it is associated with in section then select the sub-page. Specialty pages can be deleted in section . Click the 'Delete' button in section to
delete the selected pages. You will be prompted for confirmation of the deletion.Changing Navigation  fig 6.5 In order to change your navigation (Menu names and order) click the Navigation button to open up fig 6.5. From here you must decide whether to change your main page navigation or sub-page navigation.  fig 6.6 Editing main page navigation and sub-page navigation works the same way except section in fig 6.6 is not
present when working with main pages. You must first select the main page associated with your sub-pages before making sub-page changes. In section rename your menu items to what ever you want. The ?"/\<>*|:~^,%&' characters
are not allowed in a name as they could interfere with the site operation. If you wish to change the order of the pages change the numbers in section . Once your done click the 'Update'
button in section .Color Select  fig 6.7 If you are doing your own HTML coding you may want to do things such as change a font color or table background. The color select allows you to change decimal Red/Green/Blue values to hexidecimal which is needed in HTML. Single click the sliders ( ) to move them and single click to release them or enter values directly in section . The resulting color combination can be seen in section .
The Hexadecimal value for the color is shown in section . This is the value (including the #) needed for your HTML.Font Select  fig 6.8 You may want to change the size or type face of some of the text on your website. Fig 6.8 shows the font tool. Section allows you to change your
font face, weight(bold), style(italics) and size(in pixels). The box in section is where you type your text and your text will change according to your settings in .
When satisfied with the look of the text click the 'Generate HTML' button in section . Then copy and paste the resulting code that appears in section to your website.Adding Content Adding content to your website can be as simple as picking a layout, choosing your pictures and typing your text. Advanced users may wish to use HTML. The first step in adding content is to select the page you want to edit. This is done from the drop down on the main page (fig 6.0). Pages are listed in the order that they appear in the menu with sub-pages showing up immediately after the main page they are assigned to. For example if your main menu was structured
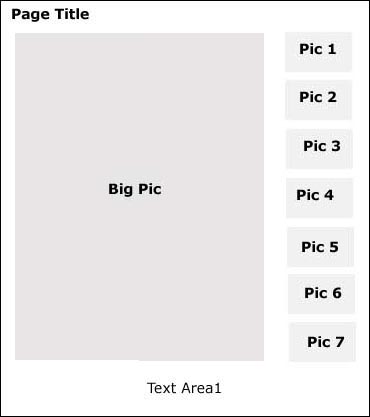
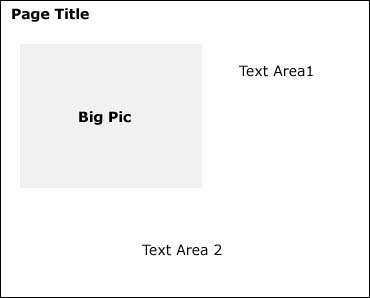
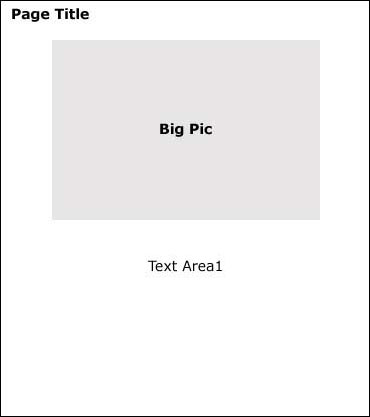
The next step is to select a Layout. There are 4 predefined layouts you may choose from: Standard, Mouse Over, Slide Show and Gallery. You may switch between the different layouts without losing your content. Only the fields associated with a layout show up when editing, except the captions with Mouseover layout. Standard Layout
Mouse Over Layout Horizontal
Mouse Over Layout Vertical
Slide Show Layout Small
Slide Show Layout Large
Gallery Layout
Form Layout
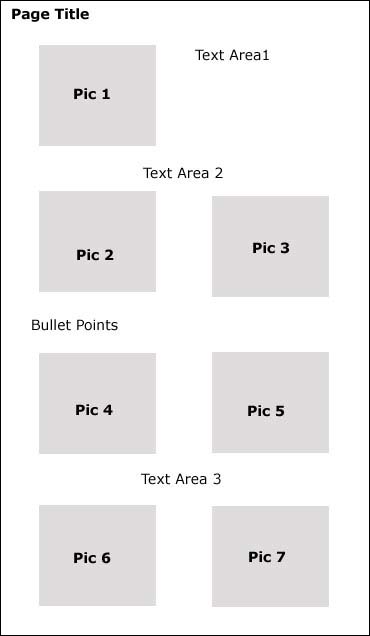
The Standard layout is the most commonly used so we will look at that page to show the different input areas, as shown in  fig 6.9 First we select the page to edit from the dropdown in section . Next we choose a layout from (in this case Standard). If your not sure what a layout will look like
click the Sample link to show a rough layout of where the items will appear on the page. All items on the webpage are optional and do not need to be entered. Enter your title in
section if desired. Select your pictures () from a drop down of ones you have uploaded to the system and a caption if desired.
Select how you want the pictures displayed with width or height being greater. The default is width is greater. Then enter your
text in the text areas like in section  . You may only use text and font tags in Areas 1 & 2 and you may use HTML tags in the text area 3. Carriage returns are preserved in Areas 1&2 but not in 3. In this area you would have to use the <br> tag to indicate a new line. The only HTML tag that cannot be used is <textarea>. If you wish to use
bullet points enter them in section . You may only use text and font tags in Areas 1 & 2 and you may use HTML tags in the text area 3. Carriage returns are preserved in Areas 1&2 but not in 3. In this area you would have to use the <br> tag to indicate a new line. The only HTML tag that cannot be used is <textarea>. If you wish to use
bullet points enter them in section  . Bullet points must start with ~ . Once you have made all your changes click the 'Update' button in section . Bullet points must start with ~ . Once you have made all your changes click the 'Update' button in section  to save your changes. to save your changes.HTML Editor  fig 6.10 For some users the layouts supplied do not meet their needs. You may want to use HTML to customize you pages. You may use HTML tags in Text Area 3 in the Standard layout if you want to completely customize a page. We have included a 3rd party HTML editor to our system to make adding HTML even easier for you. Clicking the HTML Editor button (fig 6.9( ) opens the HTML editor in a new window as seen in fig 6.10. If there is any SAVED content in Text Area 3 it
is automatically imported into the editor. Section shows what page is being edited. Section is where all
the controls for the editor are. Hovering your mouse over each icon will show the name of the button. Section is the editor window where you may add/edit
yor web page. Our system automatically links to your information so you can easily add images and link to pages in your website. Once you have finished editing your HTML clicking the
Submit button in section will send your new code back to Text Area 3 and close. Two things are important to remember here. If you are editing HTML in the editor
do not change what page you are editing in the Vendor Tools otherwise you may send the code to the wrong page. The second is that you must remember to save your changes if editing a web page after the editor closes.
It only replaces the code in the Vendors tools it does not autosave.Viewing Your Website Clicking the View Website link from the side navigation (fig 1.0 ( )) will open up your website in a new window.
Back to Table of Contents |